Description
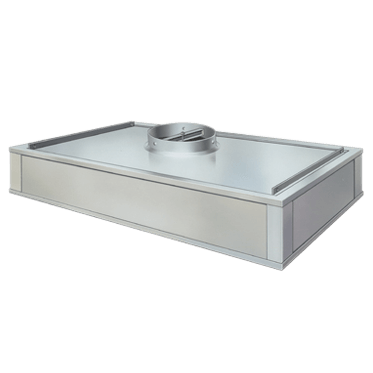
[vc_row][vc_column width=”1/2″][vc_column_text woodmart_inline=”no” text_larger=”no”]Gasket Seal Installation – TM-2 and TM-4
1. Before beginning installation of any HEPA or ULPA filter module, the system should be cleaned and blown down with both roughing filters and prefilters in place. This is essential to minimize the initial quantity of particulate that might be drawn into the filter modules.[/vc_column_text][vc_column_text woodmart_inline=”no” text_larger=”no”]2. Carefully remove each bagged module from its shipping carton just before installation. Remove the poly bag at the carton just before installation. Remove the poly bag at point of installation and inspect the filter face for shipping damage. Carefully scrutinize each unit before installation. Avoid accidentally damaging the delicate filter media while handling the filter. (Gloves are recommended to comply with some protocol requirements.)[/vc_column_text][vc_column_text woodmart_inline=”no” text_larger=”no”]3. The TM-2 and TM-4 units are equipped with four hanger support points for independently suspending the modules. Local codes, rigidity of the ceiling system, or owner preference will determine the use of hangers. These hangers are available only on the gasket version.[/vc_column_text][vc_column_text woodmart_inline=”no” text_larger=”no”]4. AAF Flanders recommends that the modules be sealed airtight against the ceiling grid. This may be accomplished by using pressure-sensitive gasketing, caulking, or non-hardening tape sealant. This is a design decision, dependent upon room performance requirements.[/vc_column_text][vc_column_text woodmart_inline=”no” text_larger=”no”]5. When connecting the flexible round duct to the module collar, avoid excessive slack in the duct. Where practical, set the housing in place, then connect the round duct to the collar. Drawbands must be positioned below the dimples in the collar to prevent slippage or blowoff of the duct connection. Stainless steel, wormgear-type drawbands are recommended.[/vc_column_text][/vc_column][vc_column width=”1/2″][vc_column_text woodmart_inline=”no” text_larger=”no”]Gel Seal Installation – TM-2 and TM-4
1. Before beginning installation of any HEPA or ULPA filter module, the system should be cleaned and blown down with both roughing filters and prefilters in place. This is essential to minimize the initial quantity of particulate that might be drawn into the filter modules.[/vc_column_text][vc_column_text woodmart_inline=”no” text_larger=”no”]2. Carefully remove each bagged module from its shipping carton just before installation. Remove the poly bag at the carton just before installation. Remove the poly bag at point of installation and inspect the filter face for shipping damage. Carefully scrutinize each unit before installation. Avoid accidentally damaging the delicate filter media while handling the filter. (Gloves are recommended to comply with some protocol requirements.)[/vc_column_text][vc_column_text woodmart_inline=”no” text_larger=”no”]3. Inspect the knife edge seal around the perimeter of the module for damage.[/vc_column_text][vc_column_text woodmart_inline=”no” text_larger=”no”]4. Set the module down into the gel seal grid. Check to be sure the knife edge on the module penetrates into the gel in the channel on all four sides to form an airtight seal. No latches are required. The weight of the module sets the unit into the gel seal grid.[/vc_column_text][vc_column_text woodmart_inline=”no” text_larger=”no”]5. When connecting the flexible round duct to the module collar, avoid excessive slack in the duct. Where practical, set the housing in place, then connect the round duct to the collar. Drawbands must be positioned below the dimples in the collar to prevent slippage or blowoff of the duct connection. Stainless steel, wormgear-type drawbands are recommended.[/vc_column_text][vc_column_text woodmart_inline=”no” text_larger=”no”]Consult product brochure[/vc_column_text][/vc_column][/vc_row]